Bondtech LGX Direct Drive for Artillery Sidewinder X1 for Copperhead

SKU: PID-00233-00
Product Summary

** Does NOT include Copperhead Hotend **

This is a LGX™ Direct Drive Setup to use on Artillery Sidewinder X1, prepared to use Copperhead™ (screw mount) hotends from Slice Engineering. Hotend, fan and nozzle are not included.

$169.95
 
Enquire Product Enquiry
GUARANTEED SAFE CHECKOUT Buy now with interest-free Installments
Zippay Afterpay
Free Shipping In Stock
Free Shipping FREE SHIPPING ON ORDERS OVER $99 T&C'S APPLY

Direct Drive Upgrade

This LGX™ based upgrade kit is a easy to install replacement of the stock direct drive extruder. It requires the accessories included in the LGX™ Accessories For Sidewinder X1 and Copperhead™ package.

Easy To Install

  1. Split the stepper motor from the extruder to install it on your Artillery Sidewinder X1.
  2. Place the mounting plate in between them.
  3. The extruder is installed facing right, using the included Direct Drive Interface Plug to attach the hotend.
  4. Set the e-steps value to 400 using g-code.

Leading Grip Power

The LGX™ is the Bondtech extruder with the highest filament grip due to its new large drive wheels that put more teeth engaging the filament.

Enjoy Bondtech’s Evolved Dual Drive Technology

Start using our newest extruder with our new Dual Drive Technology based on larger drive gears. This is only one of the 7 new features Bondtech implemented on an extruder.

7 new features on a Bondtech eXtruder:

  • Larger drive wheels, for increased filament grip;
  • Filament pre-tension lever, for repeated results;
  • Multi-function interface socket, for tool or application quick swap;
  • Drive wheels’ maintenance windows, for easy cleaning;
  • Compact, light & symmetric design, for increased performance and compatibility;
  • Multiple mounting hole patterns, for easy and flexible setup;
  • A small step for a greener Future, craft boxes without bleaching & no coating.

You can read more about the new features by clicking here.

3D Printed Housing using PA12

The housing parts are professionally printed with nylon for maximum strength and precision and higher temperature resistance.

Technical Specification

LGX™ EXTRUDER
  • e-steps value : 400 using 16 microsteps;
  • Drive wheels : hardened steel;
  • retraction speed : 35 mm/s
  • retraction distance (direct drive) for rigid materials : 0.4 mm
  • retraction distance (direct drive) for soft materials : 3 mm
  • Max operating temperature : 80°C
  • Max tightening torque on all screws is 0.3 Nm
  • LGX™ DD net weight : 218.6 g
  • Package measurements : 80x103x73 mm
  • Package weight : 269 g
  • Download the LGX Technical Drawings here.
LDO STEPPER MOTOR FOR BONDTECH LGX
  • PH-06AWJ connector
  • 2 phases
  • DC 5.5 V
  • Max 1.0A/phaseTo use the LGX, run the stepper motor with currents between ~0.45 and ~0.65A:

    Be vigilant regarding the stepper motor surface temperature.
    Keep it cool enough to touch. Lower Vref otherwise.

  • Class B motor, rated up to 130°C
    • Max recommended environment : 70°C
    • Max temperature at this environment temperature can go up to 130°C on account of the self heating.
  • Download the stepper motor Technical Data Sheet here.

How to change the Current using Vref

It is very hard to read the current being fed to stepper motors. To determine that current we rely on the Vref value. The Vref value is a voltage reference measured in VDC that can be read using a multimeter. It helps us setting the current output of the stepper motor driver.

Different 3D printer mainboards use different stepper motor drivers. Each type of stepper motor drivers has its own formula to calculate the required Vref to get a specific current. Here are some examples:

  • TMC stepper drivers.
    The formula for these drivers is Vref = ( I * 2.5 ) / Imax
    Where I is the target current value measured in A; and Imax is 1.77 on regular mode and 1.2 on SilentStepSticks mode.
  • lu A4998.
    The formula for these drivers is Vref = I * 8 * R
    Where I is the target current value measured in A; and R is the Sense Resistor value, that depends on what board are you using. Melzis use 0.1,the Creality Silent boards use 0.15, ...

    Video Guides

    01 – Stripping Down The Printer

    https://youtu.be/U5TEz2cgS5M

    02 – Preparing the Copperhead hotend

    https://youtu.be/fGVFmKP2wCk

    03 – Preparing the LGX for Copperhead

    https://youtu.be/2BCxD_s9-Mw

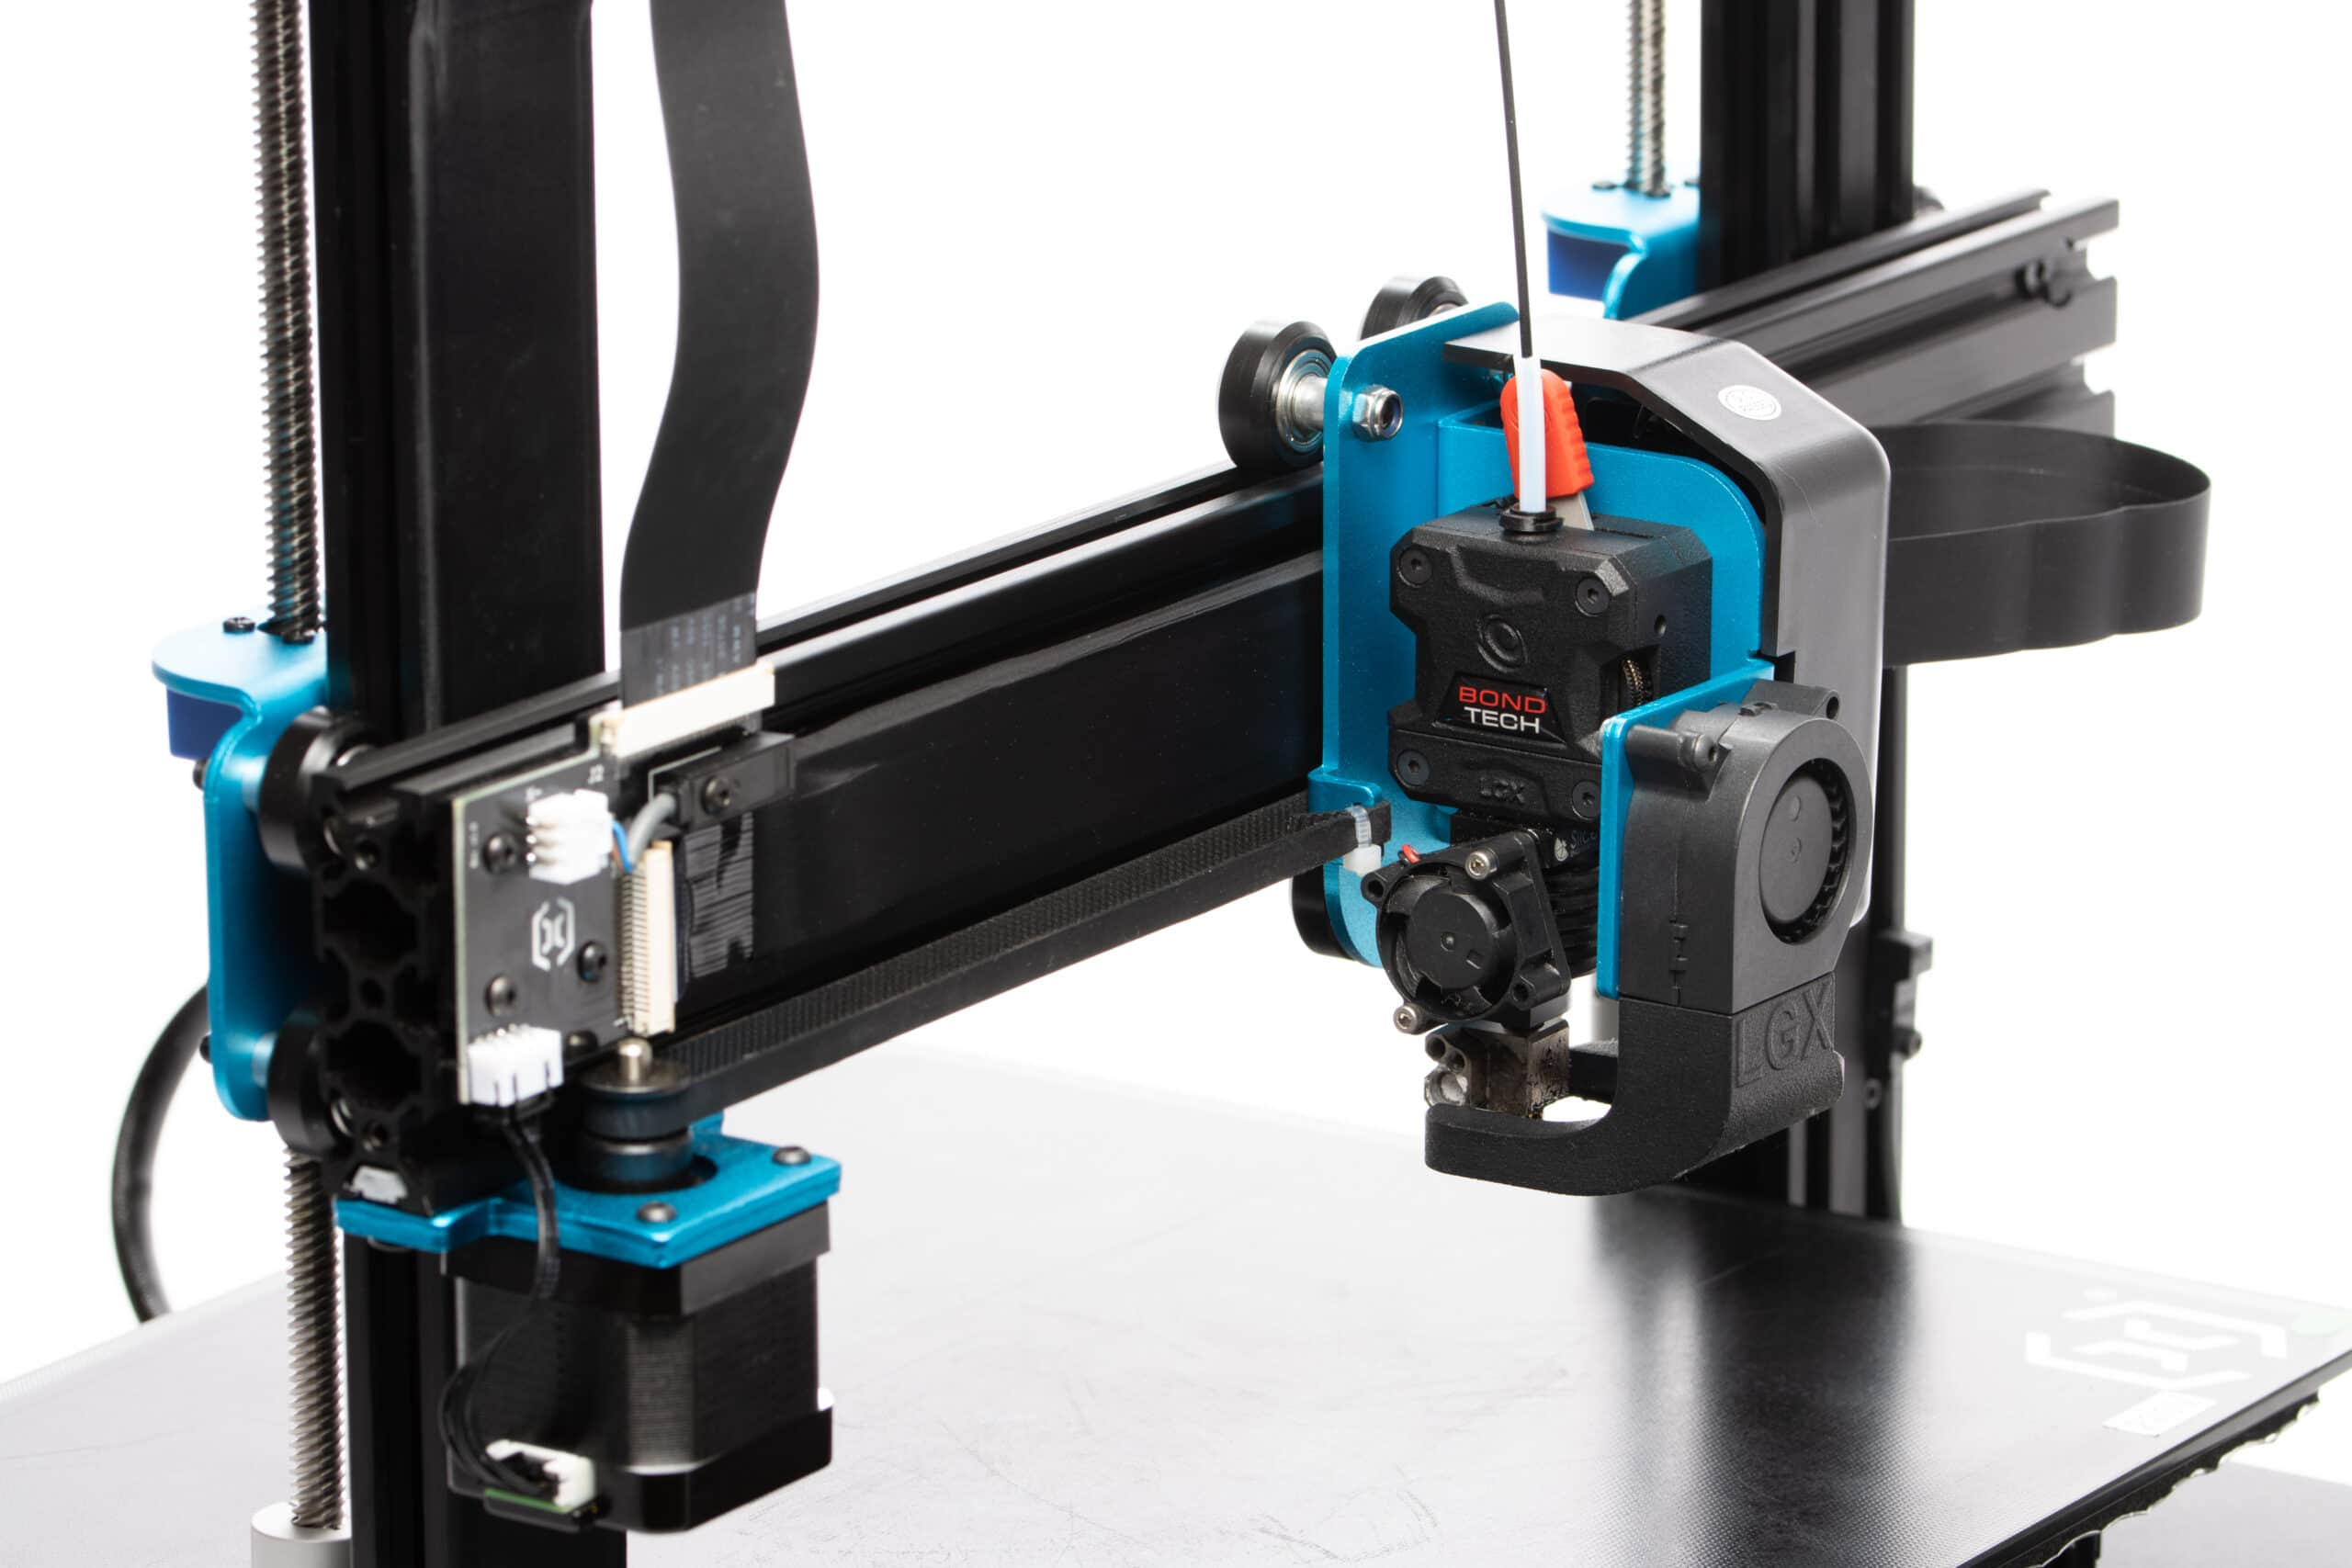
    04 – Re-assembling the print heat

    https://youtu.be/YG83-Pwgr8I

    05 – Finishing Installation

    https://youtu.be/kWkOi4_xpn4

    LGX™ Webinar

    https://youtu.be/-5v9_o3bHmg

There are no reviews yet.

Add a Review

My Shopping Cart

Added item to your cart

Cart Summary